How To Detect a Water Leak with Thermal Imaging

Water leaks and moisture infiltration can cause serious damage to a house or building, and can be difficult to detect until it’s already too late. Using a thermal imaging camera and under the right circumstances, it’s possible to find hidden water and moisture issues without resorting to destructive testing.
There are many sources of building moisture, including humidity (during any season), condensation, pipe leaks, rain and snow, and even people and animals breathing. Usually a low level of moisture is fine, but leaks or heavy condensation can cause serious problems. A thermal imaging camera cannot “see” moisture in walls, but it can detect subtle temperature differences and patterns that reveal the existence of water.
Moisture Patterns
Moisture in buildings usually spreads in a recognizable pattern depending on where the water is:
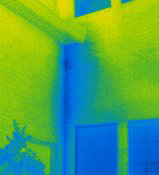
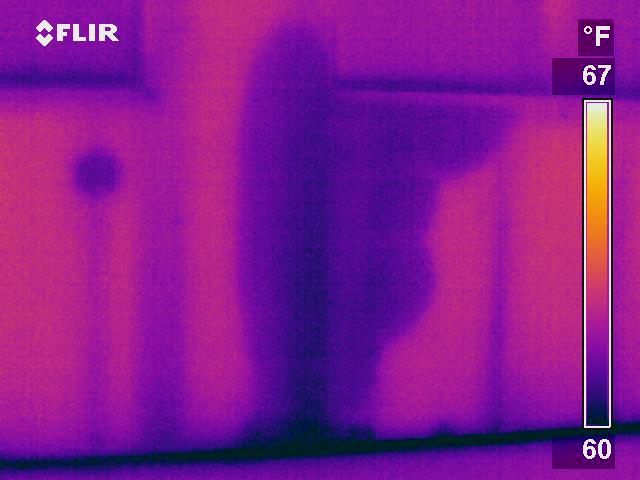
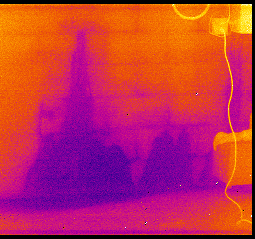
Walls - top-down triangular shape formed as water spreads downwards
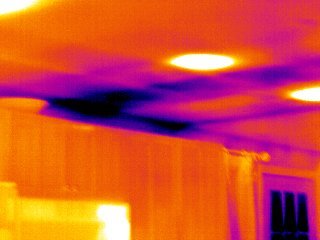
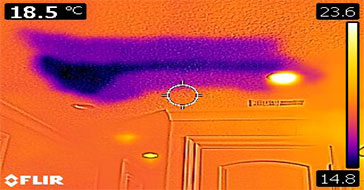
Ceiling - amorphous, unstructured shape with areas of wet, damp, and moist material spreading outwards with different temperatures
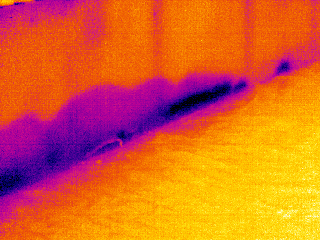
Flooding - water wicking up a wall into the insulation and up wall studs
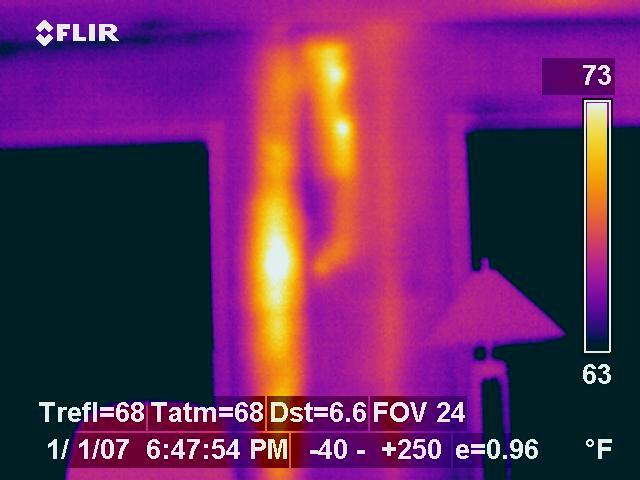
Hot Water Pipe - leaks shows as a warm area
Moisture is one of the most difficult issues to detect in a building - the signs are subtle and easy to miss until water starts dripping from the ceiling. Thermography training can help with identification, as well as getting the right camera for the job.
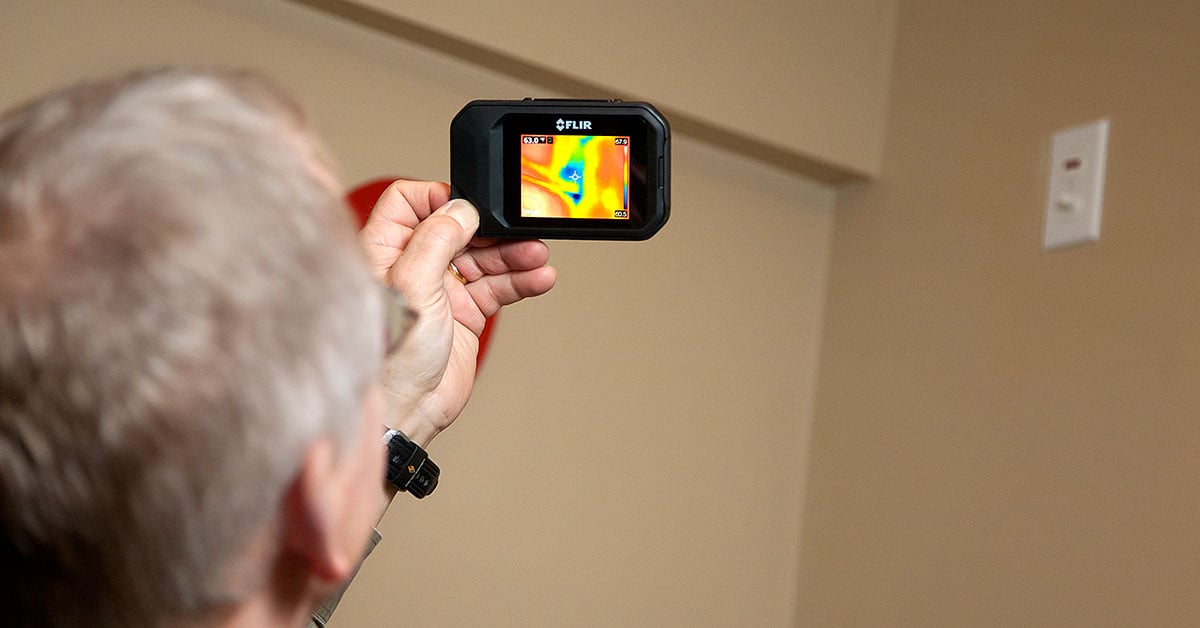
What’s the Best Thermal Camera For Moisture Detection?
Moisture tends to cause only subtle heat differentials. A thermal camera capable of detecting moisture needs to have high resolution and great thermal sensitivity (NETD), meaning that small temperature differences will be displayed. In the case of thermal sensitivity, the lower the better, so a camera with 30mK sensitivity is great for moisture applications, while a 100mK sensitivity camera is better suited for industrial applications and detecting large temperature differences.
In addition, it’s best to use a camera that allows you to manually adjust the level and span of the thermal image. Moisture problems appear best when the image is adjusted for about a 10°C or 20°C span, which helps even minute temperature differences stand out.
Great thermal cameras for this purpose include the FLIR E6 for basic applications, and FLIR E8 and FLIR E95 for higher resolution options.
Don’t Forget About Moisture Meters
Thermal cameras can help locate water and approximate the moisture extent, but identifying a pattern that looks like moisture does not guarantee the presence of water. There are a multitude of reasons you might be seeing a temperature differential besides moisture in the walls. To check what you’re seeing, you should always use a moisture meter to confirm what the thermal camera has detected.
Moisture meters from FLIR and Extech offer multiple detection options for every application, and meters like the FLIR MR176 even combine both thermal imaging and moisture measurement capabilities for both locating and testing for moisture.
When performing a building inspection looking for water leaks, be sure to take your time. Water is detected with a thermal imager due to temperature differences caused by evaporation, capacitance, or conduction, and these processes can be affected by weather conditions or interior humidity. For a full understanding of how thermal imagers can detect moisture, consider taking a thermography course through the Infrared Training Center.
Related Articles
-
 How To
How Can You Tell If Your House is Missing Insulation?
Learn more -
 Application Story
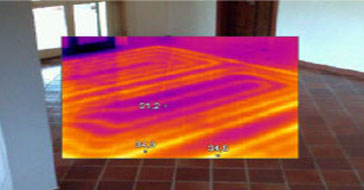
FLIR thermal imaging cameras reveal hidden defects in floor heating systems
Read the Story -
 Download
The top 5 reasons HVAC/R pros need a thermal camera
Read the Story